Have you ever wondered how to add distressing or decorative cuts to leather? It’s a question that many leathercraft enthusiasts ask, and luckily, there are several techniques you can try. Whether you want to achieve a worn, vintage look or add intricate designs to your leather creations, this article will explore different methods that can help you achieve the desired effect. So, if you’re curious about creating unique and eye-catching leather pieces, read on to discover how you can add distressing or decorative cuts to your leather projects.
Tools and Materials Needed
To add distressing or decorative cuts to leather, you will need a few essential tools and materials. Here is a list of what you will need to get started:Leather
First and foremost, you will need a piece of leather. The type of leather you choose will depend on the project you have in mind. Different types of leather have different characteristics, such as thickness, flexibility, and grain patterns. It’s important to choose a suitable leather that matches your desired outcome.Cutting Mat
A cutting mat is an essential tool for cutting leather. It provides a stable surface to work on and protects your work area. Look for a self-healing cutting mat that can withstand the sharp cuts of your utility knife without leaving permanent marks.Sharp Utility Knife
A sharp utility knife is the primary cutting tool for leatherwork. It allows you to make precise and clean cuts on the leather. Make sure to use a fresh blade for cleaner cuts.X-Acto Knife
An X-Acto knife is a versatile tool that can be used for more delicate and detailed cuts. It has a smaller blade and is perfect for intricate patterns or designs.Pattern or Stencil
Having a pattern or stencil is particularly useful if you want to create specific designs or shapes on your leather. Patterns can be hand-drawn or printed from online resources. Stencils, on the other hand, are pre-cut templates that can be used repeatedly.Ruler or Measuring Tape
Accurate measurements are crucial when working with leather. Use a ruler or measuring tape to ensure precise cuts and dimensions.Masking Tape
Masking tape can be used to hold pieces of leather together while you work. It helps keep the leather in place, making it easier to cut and manipulate.Pencil or Fine-tip Marker
To mark your leather for cutting or design purposes, use a pencil or fine-tip marker. These tools help create guidelines and ensure accurate positioning.Bone Folder or Stylus Tool
A bone folder or stylus tool is handy for scoring or creasing leather. It helps create defined lines and folds, adding depth and texture to your cuts.Optional: Leather Distressing Tools
If you want to achieve a distressed or weathered look, you can use specialized leather distressing tools. These tools may include an edge beveler for rounding the edges, a mallet for pounding, or a leather punch for creating holes and perforations. Now that you have gathered all the necessary tools and materials, let’s move on to the next step: preparing the leather.Preparing the Leather
Before you start cutting or adding decorative cuts to your leather, it’s important to properly prepare the leather. This ensures that it is clean, conditioned, and ready for the desired effect. Here are the steps you should follow to prepare your leather:Choose the Type and Thickness of Leather
Depending on your project, choose the type of leather that suits your needs. Full-grain leather is the most durable and natural-looking option. Top-grain leather is slightly thinner and more flexible. Bonded leather, a synthetic material made from recycled leather scraps, is another option. Consider the specific qualities you want in your finished product when choosing your leather. Additionally, consider the thickness of the leather. Thicker leather is more suitable for larger, sturdier projects, while thinner leather is ideal for delicate or intricate designs.Clean and Condition the Leather
Before starting any cutting or distressing, ensure that your leather is free from dirt, dust, or other contaminants. Use a damp cloth or leather cleaner to wipe down the surface. Once clean, apply a leather conditioner or protectant to keep the leather supple and prevent it from drying out or cracking during the cutting process.Moisten or Soak the Leather (Optional)
If you are planning to add more complex cuts or shapes to your leather, you may consider moistening or soaking it beforehand. This softens the leather, making it easier to cut and manipulate. However, exercise caution when using this method, as it can warp or stretch the leather if done excessively. Practice on scrap pieces of leather before attempting to moisten or soak your project piece.Create a Template or Pattern
To ensure accuracy and consistency in your cuts, it is helpful to create a template or pattern before starting. This can be done by hand-drawing or printing a design onto paper. Then, transfer the pattern onto the leather using a pencil or fine-tip marker. This serves as a guideline for your cuts and helps achieve the desired decorative effect. With the leather properly prepared, it is time to delve into the various cut techniques that can be employed to add distressing or decorative elements to your leather projects.
Simple Cut Techniques
Mastering the basics of simple cut techniques is crucial for any leatherworker. These techniques lay the foundation for more advanced and intricate designs. Here are some simple cut techniques that you can start practicing:Straight Line Cuts
Straight line cuts are the most basic and common cut technique. They are used to create clean and precise lines on the leather. To make a straight line cut, place the ruler or straight edge along the desired path and carefully guide your utility knife or X-Acto knife along the edge, applying consistent pressure. Practice maintaining a steady hand and even pressure to achieve straight and clean cuts.Curved Cuts
Curved cuts are used to create rounded or circular shapes in the leather. They add dimension and visual interest to your designs. To make a curved cut, use the tip of your knife to gently score the leather along the desired curve. Gradually deepen the cut, working in small sections at a time, while maintaining control over the knife’s direction. Take your time and practice on scrap leather to achieve smooth and fluid curved cuts.Scalloped or Wavy Cuts
Scalloped or wavy cuts create decorative patterns that resemble curves with regular curves or waves. These cuts can be used as borders or embellishments for your leather projects. To create scalloped or wavy cuts, mark equally spaced points along the edge of the leather. Using your knife, make small, repetitive cuts from one point to the next. Practice maintaining consistent spacing and depth to achieve uniform and visually appealing scalloped or wavy cuts.V-shaped or Diamond Cuts
V-shaped or diamond cuts are often used to add texture or decorative elements to the leather. They can be used individually or in combinations to achieve various patterns. To make V-shaped or diamond cuts, start by making two diagonal cuts that intersect at a point, creating a V shape. For diamond cuts, add another diagonal cut that intersects the first two cuts, creating a small diamond shape. Experiment with different angles and pattern arrangements to achieve unique and interesting designs.Slit Cuts
Slit cuts are made by slicing a small portion of the leather, creating narrow openings or slits. These cuts can be used to create decorative effects, such as adding texture or imitating stitching. To make a slit cut, carefully insert the utility knife or X-Acto knife into the leather and apply gentle pressure to create the desired length of the slit. Practice making straight and clean slits with uniform width and depth.Hole or Perforation Cuts
Hole or perforation cuts are commonly used for functional or decorative purposes. They can serve as attachment points for hardware or create intricate patterns when combined. To make hole or perforation cuts, use a leather punch or sharp object to create evenly spaced holes in the leather. You can also use a rotary punch to create multiple holes at once. Ensure consistent spacing and depth to achieve professional-looking hole or perforation cuts.Combination of Cuts
Combining different cut techniques allows you to create more complex and visually appealing designs on your leather. Experiment with combining straight line cuts, curves, scallops, V-shaped or diamond cuts, slits, and hole or perforation cuts. By layering or overlapping different cuts, you can achieve unique and intricate patterns that add depth and character to your leather projects. Let your creativity run wild and explore the endless possibilities of combining cuts. Mastering the simple cut techniques lays the foundation for more advanced cut techniques that can take your leatherwork to the next level. Let’s explore some of these techniques and how to effectively incorporate them into your projects.Advanced Cut Techniques
While simple cut techniques form the basis of leatherwork, advanced cut techniques allow you to take your projects to new heights. These techniques require patience, precision, and a keen eye for detail. Here are some advanced cut techniques you can explore:Basket Weave Pattern
The basket weave pattern involves interlacing cuts in a horizontal and vertical manner to create a woven effect on the leather. This technique adds a striking texture and visual interest to your projects. To achieve the basket weave pattern, start by making evenly spaced parallel cuts in one direction. Then, make perpendicular cuts to create a grid-like pattern. Lift the alternate strips of leather and weave them over and under the remaining strips. Practice this technique with care and attention to detail for impressive and professional results.Lattice Pattern
Similar to the basket weave pattern, the lattice pattern involves interlacing cuts, but in a diagonal manner. This creates an intricate lattice-like design on the leather. To create the lattice pattern, make diagonal cuts in one direction across the leather, ensuring consistent spacing. Repeat the process in the opposite diagonal direction, crossing over the first set of cuts. Make sure to angle your cuts correctly to achieve a visually appealing lattice pattern. Practice on scrap leather to perfect this technique before attempting it on your actual project.Fringe Cuts
Fringe cuts are created by making long, thin, and evenly spaced cuts along the edge of the leather. This technique adds a decorative and playful element to your leather projects. To create fringe cuts, mark equally spaced points along the edge of the leather and make small, straight cuts from the edge towards the marked points. Continue this process until the desired length and density of the fringe are achieved. Experiment with different widths and lengths to achieve unique and personalized fringe designs.Inlay or Overlay Cuts
Inlay or overlay cuts involve cutting out a specific shape or design from one piece of leather and placing it on top of another piece. This technique allows for the creation of intricate designs and patterns by combining different colors or textures of leather. To execute inlay or overlay cuts, start by tracing the desired shape or design onto one piece of leather. Carefully cut out the shape, ensuring clean and precise edges. Then, place the cut-out piece on top of the other piece of leather, creating a layered effect. Secure the pieces together with adhesive or stitching for a seamless finish.Intertwined or Interlaced Cuts
Intertwined or interlaced cuts involve cutting two or more pieces of leather in a way that they overlap or intersect, creating visually captivating designs. This technique requires careful planning and precision to achieve cohesive and harmonious results. Begin by deciding on the pattern or design you want to create. Make the necessary cuts on each piece of leather to create the desired overlap or intersection. Practice on scrap leather and adjust your cuts until you achieve the desired effect.Beveled or Chamfered Cuts
Beveled or chamfered cuts involve cutting at an angle to create a slanted edge. This technique adds dimension and visual interest to your leatherwork. Beveled cuts are commonly used to create rounded or sloping edges on belts, straps, or other leather accessories. To create beveled or chamfered cuts, position the blade of your knife at an angle to the leather and carefully make a cut along the edge. Take your time and practice maintaining a consistent angle to achieve clean and even beveled cuts.Layered or Stack Cuts
Layered or stack cuts involve cutting multiple layers of leather simultaneously to create complex and intricate designs. This technique is commonly used in leather carving or tooling projects. To execute layered or stack cuts, stack multiple pieces of leather together and secure them firmly. Use a pattern or stencil to mark your design onto the top layer. Carefully cut through all the layers, following the marked lines. This technique requires patience and control to ensure accurate and aligned cuts. Practice on scrap leather to familiarize yourself with this method before attempting it on your actual project. With these advanced cut techniques, you can elevate your leather projects and create stunning and intricate designs. However, before you proceed, it’s important to know how to create distressed effects on your leather to give it a unique and aged appearance.Creating Distressed Effects
Creating distressed effects on leather is a popular technique that adds character and a vintage look to your projects. Distressing can be achieved through various methods, such as an antique finish, burnishing edges, adding scratches or scuffs, staining or dyeing the leather, rubbing or sanding for a worn effect, or using specialized distressing tools. Let’s explore these techniques in more detail:Antique Finish
An antique finish gives your leather a vintage and weathered appearance. To achieve this effect, apply an antique finish product to the leather surface. This product is typically a combination of dye and a sealer that settles into the natural creases and textures of the leather, emphasizing its depth and character. Apply the antique finish following the manufacturer’s instructions, and remember to test it on a small, inconspicuous area before applying it to your entire project to ensure you achieve the desired effect.Burnishing Edges
Burnishing edges refers to the process of smoothing and polishing the edges of your leatherwork. This technique adds a professional and finished look to your projects. To burnish edges, dampen the edge of the leather with water or gum tragacanth, and rub it against a burnishing tool or a piece of canvas. Apply firm pressure while moving the leather back and forth until the edges become smooth and shiny. This technique can be combined with dye or edge paint to add additional color and depth to the edges.Adding Scratches or Scuffs
Adding scratches or scuffs to your leather can create an aged and worn appearance. You can achieve this effect by lightly sanding the surface of the leather with fine-grit sandpaper or rubbing it with a soft brush. This technique removes a small amount of the top layer of the leather, revealing the lighter-colored inner layers. Experiment with different levels of pressure and techniques to achieve the desired level of distressing.Staining or Dyeing the Leather
Staining or dyeing the leather is an effective way to change its color and give it a distressed or aged look. Stains and dyes penetrate the leather, adding depth and richness to its color. Before staining or dyeing, make sure the leather is clean and conditioned. Apply the stain or dye using a sponge, cloth, or brush, following the manufacturer’s instructions. Allow the leather to dry completely, and then apply a protective finish or conditioner to seal in the color and protect the leather.Rubbing or Sanding for a Worn Effect
Rubbing or sanding the leather can give it a worn and vintage appearance. This technique removes the top layer of the leather, exposing the lighter-colored inner layers. You can achieve a worn effect by lightly sanding the surface of the leather using fine-grit sandpaper or rubbing it with a soft brush. Focus on areas that would naturally receive wear and tear, such as corners or edges. Experiment with different sanding techniques and levels of pressure to create a convincingly worn look.Using Distressing Tools
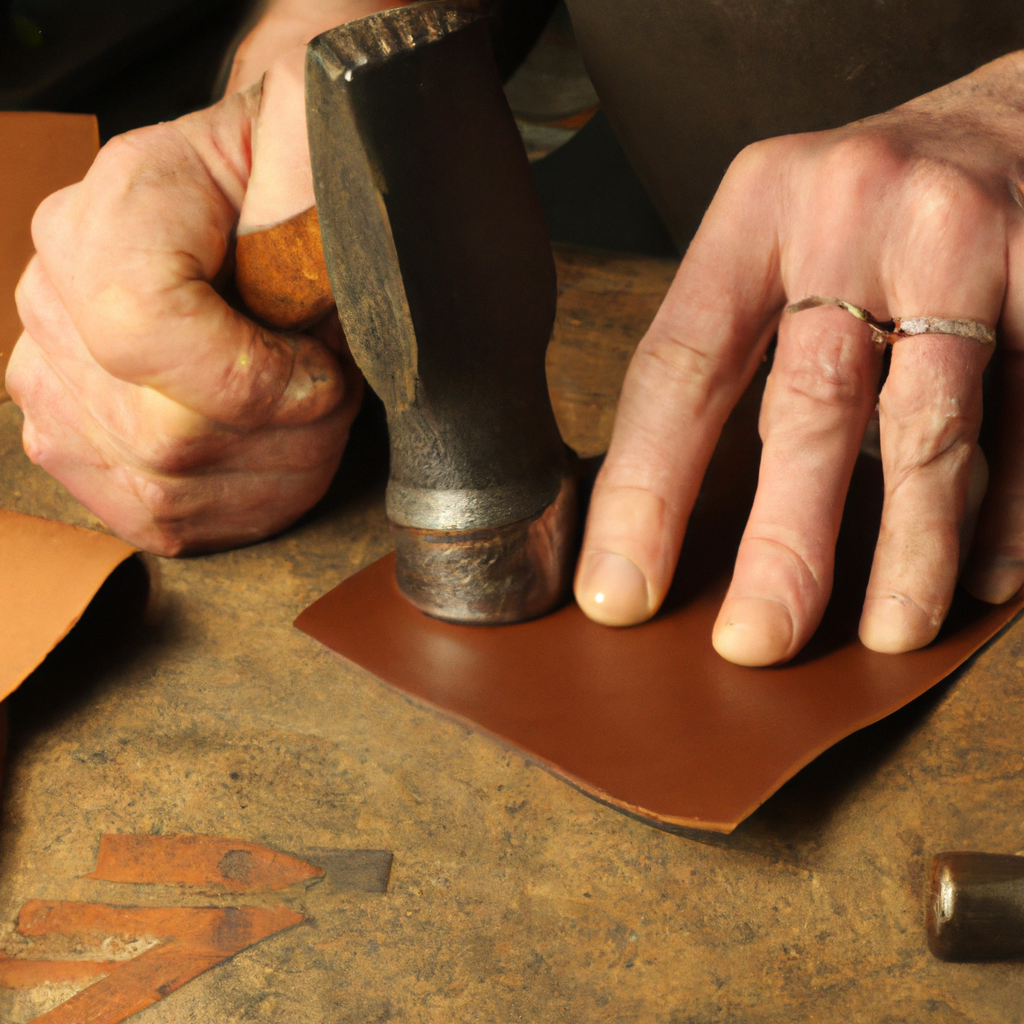
Specialized distressing tools, such as an edge beveler, mallet, or leather punch, can be used to add additional distressed effects to your leatherwork. An edge beveler rounds the edges of the leather, mimicking natural wear and tear. A mallet can be used to create dented or hammered textures, while a leather punch can create holes or perforations for an aged appearance. Experiment with different distressing tools to achieve unique and customized effects on your leather projects. By incorporating these distressed effects into your leatherwork, you can achieve an aged and weathered appearance that adds character and uniqueness to your projects. Practice and experiment with different techniques to find the perfect combination of cuts and distressed effects for your desired aesthetic.Techniques for Precise Cuts
Achieving precise cuts on leather requires the use of proper techniques and tools. To ensure clean and accurate cuts, consider the following techniques:Using a Cutting Mat and Ruler
A cutting mat provides a stable and protective surface for cutting leather. Place the leather on the cutting mat, aligning it with the desired cutting lines. Use a ruler or straight edge as a guide to ensure straight and accurate cuts. Apply light pressure to the ruler while making your cuts to prevent it from shifting.Applying Masking Tape or Painter’s Tape
Masking tape or painter’s tape can be used to secure the leather and prevent it from moving while you cut. Apply strips of tape along the edges of the leather, ensuring they are firmly attached to the cutting surface. This technique provides extra stability and helps create cleaner and more precise cuts.Using a Pattern or Stencil
Using a pattern or stencil is particularly useful when you need to replicate specific designs or shapes on multiple pieces of leather. Place the pattern or stencil on top of the leather and secure it with masking tape. Trace around the pattern or stencil using a pencil or fine-tip marker. This technique ensures consistent and accurate cuts across multiple pieces.Securing the Leather Properly
Properly securing the leather is essential to avoid unnecessary movement during cutting. Use clamps or leather weights to hold the leather in place. This ensures the leather remains stable and provides greater control when making your cuts.Working with Multiple Layers of Leather
When working with multiple layers of leather, it’s important to align them correctly and secure them firmly. Use clips or clamps to hold the layers together before making your cuts. This technique helps maintain the shape and alignment of the layers, resulting in accurate and precise cuts. By following these techniques, you can achieve cleaner and more precise cuts on your leather, ensuring professional-looking results. However, it is crucial to prioritize safety and take necessary precautions throughout the leather cutting process.Safety Precautions
Working with sharp tools and potentially hazardous materials requires attention to safety. To ensure a safe cutting experience, follow these safety precautions:Wearing Protective Gloves and Eyewear
Leatherwork involves handling sharp tools and materials that can cause injuries. Always wear protective gloves and eyewear to protect your hands and eyes from accidental cuts or debris. Choose gloves made from a material that offers sufficient dexterity while still providing adequate protection.Working in a Well-Ventilated Area
Some products and processes used in leatherwork, such as stains or dyes, may produce fumes or odors. To ensure a safe working environment, always work in a well-ventilated area or use a portable ventilation system. Proper ventilation helps prevent the buildup of potentially harmful fumes or chemicals.Proper Handling of Sharp Tools
Sharp tools, such as utility knives or X-Acto knives, can cause serious injuries if mishandled. Always handle these tools with care and use them responsibly. Keep the blades of your knives securely covered when not in use. When cutting, use controlled and deliberate movements to avoid slip-ups and accidents.Being Cautious of Hand Placement
While cutting leather, it’s important to be mindful of your hand placement. Ensure your hands are clear of the blade’s path and any potential pinch points. Maintain a firm grip on the leather while cutting, but do not place your fingers or hand in close proximity to the cutting edge. By following these safety precautions, you can create a safer working environment and reduce the risk of accidents or injuries. Now that you are equipped with knowledge about tools, techniques, and safety precautions, it’s time to practice and experiment to sharpen your skills and take your leatherwork to new heights.Practice and Experimentation
Practice and experimentation are key to honing your leather cutting skills. By starting with simple cuts and gradually increasing the difficulty level, you can build confidence and expand your expertise. Here are some tips to enhance your practice sessions:Starting with Simple Cuts
Begin your practice sessions by mastering the simple cut techniques outlined earlier. Start with straight line cuts and gradually progress to more complex cuts such as curves, scallops, or slits. Practice on scrap pieces of leather, paying attention to your technique and precision. As you become more comfortable and confident, move on to more advanced techniques.Gradually Increasing Difficulty
Once you have mastered the basics, challenge yourself by introducing more complex cut techniques into your practice sessions. Explore advanced techniques such as basket weave patterns, layered cuts, or intricate designs. Push your boundaries and experiment with new ideas to expand your skill set.Trying Different Techniques
Don’t limit yourself to one type of cut technique. Experiment with various techniques and combinations to explore different design possibilities. Consider how different cuts can complement or enhance each other. Embrace the spirit of creativity and explore unconventional approaches to achieve unique and personalized results.Taking Inspiration from Existing Designs
Seek inspiration from existing designs or patterns to jumpstart your creativity. Look at leatherwork projects, art, or even nature for inspiration. Analyze how certain cuts are used to create specific effects or designs. Adapt and modify these designs to suit your own projects, adding your personal touch along the way. Remember, practice makes perfect. Invest time and effort into practicing and refining your leather cutting skills. Be patient with yourself and embrace the learning process. With consistent practice, you will gradually develop your style and expertise.Finishing Touches
Once you have perfected your cuts and achieved the desired decorative effects, it’s time to add the finishing touches to your leather projects. These final steps add polish and refinement to your work. Here are some finishing techniques to consider:Sanding Rough Edges
Inspect your cut edges for any roughness or imperfections. Use fine-grit sandpaper or a sanding block to smooth out any rough edges. Sand gently and gradually to avoid over-sanding or damaging the leather. Wipe away any dust before proceeding to the next step.Applying Leather Conditioner or Finish
To protect your leather and enhance its appearance, apply a leather conditioner or finish. Leather conditioner moisturizes and nourishes the leather, preventing it from drying out or cracking. Apply the conditioner evenly using a clean cloth or sponge. Allow it to penetrate into the leather and then buff any excess conditioner off the surface. If desired, apply a protective finish to seal and protect the leather from stains or moisture.Polishing the Leather
Polishing the leather adds a professional and refined look to your projects. Use a soft cloth or brush to gently buff the leather surface. Apply a leather polish or wax to add shine and enhance the color of the leather. Buff the leather in circular motions until you achieve the desired level of shine.Embellishing with Other Materials
Consider adding additional materials such as beads or rivets to embellish your leather projects. Beads can be sewn onto the leather using a needle and thread, while rivets can be inserted into pre-made holes using a rivet setter. These embellishments add a decorative and personalized touch to your work. By paying attention to these finishing touches, you can elevate your leatherwork from good to exceptional. Remember to take your time, work meticulously, and enjoy the process of bringing your leather projects to their full potential.Can I Use the Same Techniques for Adding Color to Leather as I Would for Distressing and Decorative Cuts?
When it comes to leather, there are easy ways to add color, distress, and decorative cuts. However, each technique requires different tools and methods. Adding color can be achieved with dyes or paints, while distressing and decorative cuts often involve tools like sandpaper or blades.