
Introduction To Leather Working Projects for Beginners
leather working projects for beginners can be a fantastic hobby and a great way to create unique, beautiful pieces that make great gifts, home décor, and personal accessories. Many types of leatherworking projects can be done with various tools and materials, and they vary depending on the individual’s level of knowledge and skill.
Here we will cover a variety of leatherworking projects suitable for beginners, so no matter what your skill level, you can find something to suit you:
Overview of leatherworking
For centuries, leatherworking has been a popular craft that produces functional and decorative items. In addition to fabricating items with leather and other materials, leatherworking encompasses proper conditioning, cutting, and stitching tools and techniques. It is a skill that can last you a lifetime, providing enjoyment while making items such as wallets, purses, belts, bags, and shoes.
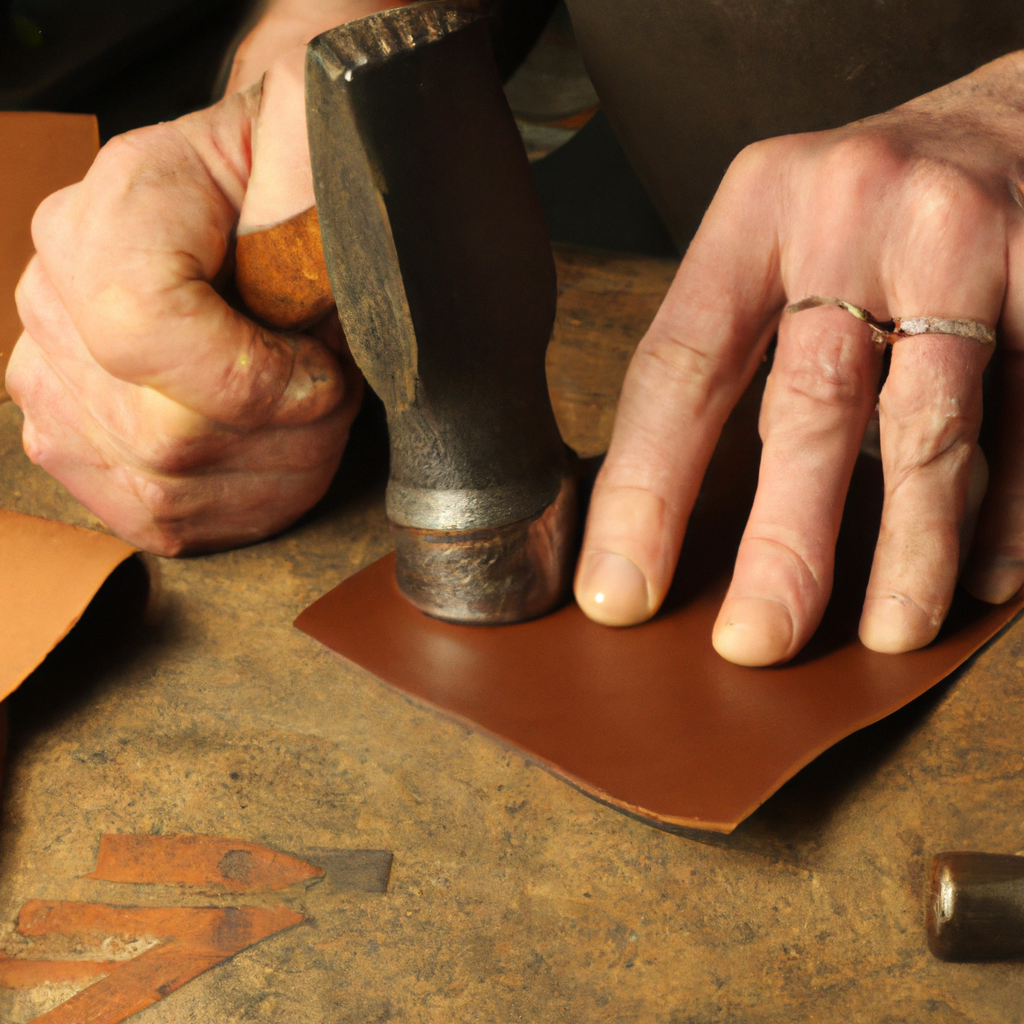
The three main areas to specialize in are tooling (or stamping), carving, and dyeing. Tooling entails using special metal tools “stamped” into the leather with a mallet to create designs such as scroll-work or floral patterns. Carving involves using special knives to cut or “chisel” out intricate structures on the leather. At the same time, dyeing entails tinting the leather with various colors or stains to enhance its look or cover any flaws. Other techniques include stitching (for bags and wallets) and embossing, which gives texture to your finished product and can be done quickly without much expertise.
Leatherworking projects typically require basic craft skills, including understanding geometry for pattern-making (for example, if working from measured dimensions) and an affinity for handwork such as sewing by hand-stitching, punching stirrups, folding edges along defined lines, etc. It also requires knowledge about the properties of different types of leather in preparation for dying and adequately treating the item for optimum use over time. These topics will be covered in this guide to help you understand the essentials that will ensure the successful completion of your projects, whether they are straightforward wallets or complicated footwear!
Tools and materials needed
If you’re new to leather working, it’s essential to take the time to familiarize yourself with the supplies you need before beginning a project. Of course, many items, such as patterns and glues, can be helpful for complex projects, but all the basics are needed for tasks like wallets or handbags. Here are some supplies you will need to get started on any beginner leatherworking project:
Leather: The kind of leather depends on what you plan to make and how it will be used. Choose thicker hides for durability and thinner, supple hides for finer detail work. No matter what type of leather you choose, ensure it is dry.
Thread – Waxed thread is best, as the unwaxed thread may fray during the stitching process. Different types of needles can also be used depending on the project.
Ruler – This will help you measure your leather accurately and evenly while cutting or stitching. A cork-back metal ruler with a sharp edge is recommended to make scoring your leather easier when necessary.
Craft knife: An excellent craft knife with a sharp blade can be used to cut intricate shapes on your project pieces or parts. It would help if you kept an extra edge on hand in case yours goes dull quickly due to the complex nature of most types of leather.
An edge slicker (or burnisher) creates smooth edges from softer leather materials after cutting and punching holes during construction steps, such as lacing sections together. The smoother the boundaries are, the better overall appearance your pieces will have once finished!
Simple Projects
Leatherworking is a great craft for beginners. It’s accessible, relatively easy to learn, and rewarding. There are many simple, straightforward projects to start with so you can get the hang of leatherworking, and it’s also a great way to craft unique and eye-catching items. Plus, leather is durable and can last for years when taken care of properly.
Let’s take a look at some of the simple projects that are perfect for beginner leatherworkers:
Leather Keychain
A leather keychain is a great beginner project and perfects if you’re starting your leatherworking journey. It’s a great choice for all levels and makes an excellent stocking stuffer or handmade gift. Plus, it’s easy to customize and make unique any way you want!
The process of making your leather keychain is quite simple. Start by cutting two pieces of leather – one slightly larger than the other – in your desired shape or size. Try using 3-4 ounces of vegetable-tanned leather instead of thicker cuts for more miniature keychains.
Next, punch two holes on the smaller piece – just large enough to accommodate the straps/buckles/hardware you’ll use once the keychain has been put together. Place both pieces together and sew them with a saddle stitch if desired – this gives it a nice finish touch when completed! Alternatively, use an adhesive like E6000 to bond them together if sewing isn’t an option.
Choose the hardware that works best for your design – try using rings for larger keys or buckles for minor keys – attach these pieces to each side of your leather keychain with snaps or rivets as desired! Once all of the hardware is connected, it’s time to dye and seal your work of art with colorful dyes or leave it natural – either way will look great once finished!
Enjoy carrying around your personalized & unique handcrafted leather keychain made by YOU!
Leather wallet
Before you start crafting, choosing the right type of leather is essential. One of the most popular leather crafting projects for beginners is learning to make a simple wallet. With just a few supplies and tools, you can make your handcrafted wallet that will last for years.
For wallets, it’s best to use thicker vegetable-tanned leather with an even grain flexible enough to fold easily around the edges and snap closures. Other materials include a snap closure set, snips, a rotary cutter, and knitting needles (optional). The following steps will help guide you through creating your first leather wallet:
Cut out your design: Using either a rotary kit or snips, trace out the shape of your wallet on the leather and cut it with clean edges – be sure to mark extra allowances along the edges for folding and sewing. Using knitting needles, use them to chamfer any rounded corners on the design, making it easier to fold inwards later.
Assemble: Begin folding along each side of the cutout as desired for your finished design. Ensure everything lines up correctly since this holds everything together when sewing or gluing later. Glue or sew where necessary for areas that need extra reinforcement, such as pocket access points and along closure flaps; unless noted otherwise, all other seams should just be sewn shut without gluing them at this time as they may become loose over time due to stretching of the material when in use or between cleaning cycles, etc.
Install Closure System: Attach corresponding ends of any desired closure system (e.g., snaps) where needed, following the manufacturer’s instructions (e.g., by stitching or riveting). Make sure these are adequately secured!
Finishing Touches: Use additional details – such as thread choice (based on color/material preferences) – to balance your project’s look and feel (i.e., visual aesthetics over function). This includes additional stitching lines around all four sides if desired; this will reduce overall flexibility but increase durability against wear & tear over time, entirely dependent on personal preference/usage!). Finally, add edge protection via a burnishing tool or wax so smooth surfaces won’t snag against clothing; congrats! You now have successfully created your very own personalized leather wallet!
Leather coasters
Leather coasters do great projects for beginners and are perfect for showing off your craftsmanship. They are easy and inexpensive and make great gifts for friends or family.
To make coasters, you will need a few essential tools such as an awl, mallet, scissors, ruler, hole puncher, leather stitching needles, thread (Waxed polyester thread is the most durable choice), leather dye or paint, and clear sealer. You will also need some leather (rough side out) in your chosen color.
The most important part of the process is cutting the leather pieces to measure four inches in length and width. Once that’s done, use an awl to create holes where each corner will be stitched together. Then use a mallet to drive needles through the leather along each corner; then, thread the hands with waxed polyester thread until all sides have securely stitched together.
The finishing touches include applying dye or paint if desired and sealing it with a straightforward sealer movie once dry; this helps protect it from moisture. You’ll be left with beautiful leather coasters that your friends and family will love!
Intermediate Projects
Gaining experience in leatherworking is a great way to increase your skills in this craft. For those of you who have some experience with leatherworking, there are plenty of intermediate projects that you can take on. These projects are slightly more challenging and require a deeper understanding of the techniques and materials used in leatherworking.
In this section, we’ll provide some examples of intermediate leatherworking projects that you can try:
Leather belt
The leather belt is a classic project for beginners in leatherworking. It requires few materials and tools and allows you to understand further how to craft with leather. Plus, it allows you to work with an incredibly durable material that will last for years, making it an ideal accessory worn with any outfit.
Before getting started on your leather belt, consider how much belt width and length you would like and the type of closure you would prefer. Common closure choices include a metal buckle or snap button, although other closure types are possible. Additionally, choose a color and style of leather that suits your desired look—suede or smooth leather will give you different results!
Once you’ve collected all your necessary materials and tools—a rotary cutter or utility knife, cutting mat or surface for safety purposes, vegetable-tanned leather (or any other preferred material), ruler/measuring tape for accuracy when measuring—you’ll be able to begin creating your belt from scratch! Cutting it correctly is critical; the end pieces can always be adjusted. However, incorrectly cut pieces will cause unnecessary complications due to high stretching potentials in some areas near buckles or snap buttons. Once complete, finish by sanding edges evenly and even protecting them with dye or wax if desired. Before long, you’ll have the perfect custom-made accessory to show off!
Leather tote bag
Tote bags are a great way to wet your feet in leatherworking. Although they involve a moderate level of skill and difficulty, they can be completed by most intermediate hobbyists. The supplies you need to make a leather tote bag are minimal – 6-7 oz vegetable-tanned leather, a sewing machine, thread, rivets, and a rivet setter tool.
Before you begin, you must decide on the bag size and prepare your pattern pieces accordingly. It is essential to adhere strictly to the instructions for each part of constructing your bag; for instance, for cutting out pieces, use sharp scissors or a craft knife so your edges look clean and professional. Utilizing an existing pattern or creating one from scratch that can be easily adjusted are both viable options.
Sewing together the separate components can seem daunting at first; however, it will soon become second nature with practice! Next comes punching out holes in the leather pieces that will later need to be sewn together – these holes must all align perfectly! Use either a hole punch or an awl when doing so, but whichever tool you use should match the size of the chosen thread. If available, you may want to consider using waxed thread since this type is more durable and less prone to breaking than regular cotton threads.
The last step is adding rivets as desired – these will provide extra support and add visual interest. Be sure that whatever type of rivet setter you have matched up with the size of rivets used before beginning this process – this could also include setting snaps onto certain areas if desired; note that some additional tools may be necessary for this step as well (such as pliers).
Now, you have created a beautiful handmade leather piece – enjoy it for years!
Leather Journal
Creating a leather journal is an ideal project for beginning leatherworkers, as it combines many of the fundamental techniques within one piece. You will need leather, essential tools, and a few additional bytes of imagination to make one.
Before beginning a project like this, it’s essential to consider what type of leather to use. Many styles are available, from thinner lightweight hides to thick full-grain leathers. For a beginner project, we would recommend that you start with something mid-weight and durable but still soft enough to be easily shaped and stitched; it’s also essential to think about what color would work best for your size and shape, as this can have a significant impact on the final look.
The construction of this project will involve several processes, such as:
cutting out your desired shape with either scissors or a rotary cutter,
edging & beveling the edges using an edge slicker or file;
punching holes through which wires or thread can be passed;
and assembling them using either saddle stitching (traditional) or overstretching (modern).
You should also consider any decorative techniques or hardware you may want to add – including brads, lacing, conchos, or other custom elements – as these will increase your skill level significantly but offer excellent results if done correctly. Once complete, all left is for you to line the cover (decorative paper does the job nicely!) and fill the pages with your thoughts/creations!
Advanced Projects
Leatherworking is a craft that requires patience, practice, and knowledge. Advanced leatherworking projects can often require more expensive materials and specialized tools but can yield beautiful and unique results. Once you have mastered the basics, you can move on to more complex leatherworking projects.
In this section, we will cover some of the more intricate projects that you can tackle:
Leather boots
Leather boots are a popular item among leather working projects for beginner crafters. Crafting a pair of leather boots is an excellent way to get started in leatherworking, as it requires only moderate skills with the tools. There are many patterns and different types you can choose from.
When selecting your leather, look for full-grain vegetable-tanned hides if you’re looking for a high-quality, durable boot. Using vegetable-tanned leather will provide more options because it is standard to dye and finish any coat. It can also lead to more opportunities in constructing the boot design since folding and creasing will be necessary.
Once you have selected your leather, you should decide on the design of your boot before beginning construction. The basic shape of a boot consists of an upper portion or shaft (top part) and a sole (bottom part). You may make modified designs, such as adding straps or buckles or extended tops over the ankle area, depending on what type of boots you want to create.
You may also choose between purchasing patterns or creating your design from scratch by measuring your foot size and adding details to correspond with other features, such as straps and tongues. If starting from scratch, sketch the pattern on paper or plastic for something visible and tangible when creating your boots.
Before starting assembly, be sure all cutting edges are smooth using sandpaper for aesthetic appeal later on when applying color dyes or finishes if desired; then mark out all areas where the lacing process may occur – including eyelets – along with prepping holes for any buckles, zippers or fabric reinforcements that may be present in the design plan of your boot creation. Now that everything is prepared, assemble your pieces just as planned!
Once you have assembled your pieces into one complete piece that resembles a pair of boots, go ahead and add in some finishing touches such as dyes (or other color finishes) if desired, followed by additional reinforcement processes like using cloth linings for comfort purposes before making sure all drawstrings fingers secure properly within their respective eyelet enclosures thus being able to lace up correctly upon full completion!
Leather jacket
A leather jacket is a classic leatherworking project perfect for those just starting. You can find premade patterns and kits or make your pattern from an old coat that fits you well. When it comes to leather, the quality of the material can make or break a project – choose carefully and look for something thick enough to hold its shape while remaining flexible enough to sew.
Tools needed for this project include:
- Leather needle
- Rotary cutter
- Thread snips
- Ruler
- Marking pen/chalk pencil/tailor’s chalk
- Upholstery weight nylon thread
- Binder clips/dressmaker pins
If this is your first time working with leather, you may also want to invest in a thimble and specialized tools like groovers and stampers.
Before you get started, wash and condition the leather to stay soft throughout its lifespan as a jacket. Then mark out all of your pieces on the wrong side of the material with a marking tool – an acrylic ruler helps keep everything straight and symmetrical, as does measuring twice before cutting once! Follow your pattern instructions carefully – chances are there are specific steps that should be taken to ensure the successful assembly of the pieces (like pre-sewing darts).
It’s best to start sewing together small pieces of the jacket rather than trying to tackle large sections – this will help ensure accuracy and even stitching. Use more extended than ordinary stitches when working with leather to stay in place better; hand-stitch any more intricate details like pockets or lapels last. Once finished, test each seam by pulling on them to ensure they’re strong enough – no one likes a broken zipper!
With patience and practice, you will soon have a unique new clothing item made yourself entirely! So why not pick up some leather tools today and challenge yourself by making your stylish leather jacket?
Leather saddle
The leather saddle is an excellent project for those who have already mastered basic tooling and construction skills and want to build on them. This guide outlines the steps you’ll need to take to construct a D-ring style saddle, one of the most popular designs, beginning with selecting the leather.
The essential elements of your saddle include the type of leather, tooling design, dyes used, lining materials, and finishing process. It is best to select a high-quality 4-5 ounce vegetable-tanned leather with either a smooth or textured finish depending on what look you are going for. Tooling designs can range from complex floral patterns to electric or classic single-line carvings. Dye choices might include some combination of cream, tan, reddish brown, or black, depending on the desired color outcome. Cordura nylon is often utilized for lining materials due to its durable strength and ability to repel moisture and dirt build-up compared with other fabrics like cotton or linen.
Whichever method you choose, you must take care in prepping surfaces before adhering any parts together so that optimal securing of pieces occurs for maximal strength during use.
Your final step would be finishing, which includes applying oils and waxes before stitching all components togetherThisill provide an appealing sheen with improved water resistance over time due to maintaining its condition through regular conditioning sessions with specialized products sold in supply shops carrying leather goods like saddles.
All these detailed steps can be overwhelming, but building a quality custom saddle is an exceedingly rewarding experience as long as proper research and care are taken before taking on this advanced project!
Conclusion
Leatherworking can be fun and rewarding, and it’s a great way to get creative. We’ve discussed different types of leatherworking projects for beginners. Whatever your goal is, from basic repairs to creating art, with suitable materials and patience, anyone, regardless of experience level, can create something beautiful out of leather.
In this article, we’ve gone over the basics for leatherworking, discussed some popular leatherworking projects for beginners, and discussed the importance of practice and patience:
Basics of leatherworking
Popular leatherworking projects for beginners
The importance of training and patience
Benefits of leatherworking
Leatherworking is an art that has been around for centuries, but it’s gaining renewed interest from craftsmen who appreciate its deep, distinctive character. The unique texture and color of leather make it ideal for crafting various projects, from wallets, belts, and purses to craft pieces and furniture. It’s also an excellent way for beginners to explore the creative potential of working with leather and fabrics.
Leatherworking can be very rewarding in terms of both quality results and creative expression. Here are some of the fantastic benefits you’ll enjoy when taking on leatherworking projects:
Creative Satisfaction: Leatherworking allows you to create something unique with your own two hands. Through this process, you can find joy in designing and creating something that’s your own – visually beautiful and crafted with hard work and attention to detail.
Practical Utility: Not only will the final product look stunning – it can also be used in everyday life! From bags to jewelry boxes, wallets to belts, countless items can be made using leatherwork techniques. So you can proudly handcraft pieces with practical use and personal meaning.
Connection with History: Working with leather means tapping into a rich history beyond our lifetimes. You’ll get an appreciation for the materials used throughout many generations – including traditional tools such as needles, awls, suede brushes, and more! This gives you a beautiful sense of continuity while undertaking your project.
Learning New Skills: When learning to work with leather, the sky’s the limit – there are many possibilities! Home-based workshops now offer classes on advanced techniques such as saddle-stitching or advanced tooling designs; even simple projects like making keychains are enough for experienced crafters alike. So you’ll surely pick up new skills no matter where you start!
Resources for further learning
No matter how skilled of a leatherworker you are, there is always more to learn and ways to perfect your craft. From patterns and templates to leather care and tool maintenance, you must seek resources to help you hone your skills.
Books are probably the most reliable source of information and offer the benefit of reviewing the info offline (as well as online). Popular titles include Leather Crafting 101 by Dona Meilach, Tandy Leather Craftsman’s Guide by Cliff Carleton, and The Complete Guide To Working with Leather by Swaine Adeney Brigg Co Ltd. Amazon is also an excellent resource for purchasing materials for projects as well as tools for leatherwork.
Local art centers often offer a variety of courses catered towards beginners just starting their crafting journey. Additionally, attending classes or workshops hosted by experts can be an invaluable way to gain in-depth knowledge about various aspects of leatherworking, from leather selection, patterning, and construction through dyeing and finishing techniques. Alternatively, subscribing to YouTube channels or other social media sites for updates about personal tutoring sessions or classes hosted in different locations can provide access to such resources.
Frequently Asked Questions
Q: What materials do I need to get started with leatherworking?
A: You will need tools such as an awl, a leather cutting knife, scissors, an edge beveled, a mallet, and a stitching groover. You will also need leather, needles, thread, glue, and other decorative materials to complete your project.
Q: What type of leather should I use for my project?
A: The type of leather you should use depends on the project you are attempting to make. Vegetable-tanned leather is a good starting point for most tasks; it is solid and durable. Other types of leather, such as chrome-tanned, oil-tanned, or full-grain, can also be used depending on the project.
Q: What are some easy leatherworking projects for beginners?
A: Some easy leatherworking projects for beginners include making wallets, keychains, belts, and bookmarks. These projects are relatively simple and require essential leatherworking tools and materials